Tuesday, December 14, 2010
Links!
Here's a whole post devoted to Art Teachers online! It's great to be able to browse, especially when you're home with a sick child.
Thursday, December 9, 2010
Easy Elf Ornaments - Les Lutins pour le Sapin!

I LOVE this craft, this is the second year I've done it. We get these cool little portrait-stickers when the kids get their school pictures done - some teachers give them to their kids, but I always hang onto them, as they make for great mother's day, father's day and Christmas gifts. I made this template of an elf, based on the size of the sticker. On an 8.5x11 piece of paper, I can fit 4 elves, enough for 2 elf ornaments.
(If you want me to try and scan and email this template, you can email me :)

Then I cut them up, and stick on the sticker and hand them out. I normally print them onto cardstock, but I did it onto normal paper by accident and it was fine.

Get the kids to colour it and glitter it up.
Then I roll it around a toilet-paper tube and staple the bottom and top.
I love my class of little elves!

Tuesday, December 7, 2010
Snowman Families - Les familles de neige


I love the idea of doing a family of snowmen that Gail did. While she used a series of different pre-cut foam circles to print her snowpeople, I didn't have any pre-cut circles that would work to stamp. Then I remembered a few posts on my blogroll from a few months ago about teachers who were having their students make their own stamps out of plastecine! Now THAT I had!

I showed the kids how to roll a ball with the plastecine and then press it down to create a circle on the bottom. By making their balls bigger and smaller, they could create a variety of sizes of circles for their families. Then I showed them how to make a snowflake stamp by making indentations with the side of their pencils or poking the pencil in the circle. All of these "stamps" were then dipped in white poster paint and printed on green or red construction paper.

Finally, this afternoon, we paired up with some big buddies to play on letterplaygound! Each kid made their last name to go with their snowman family.

Snow Flakes - Les Flocons de Neige

This was a project done on both large and small scales. I taped 2 12x18 sheets together to create the large for our Xmas concert backdrop (mounted on black) and then I also did the same project on a piece of 8.5x11 cardstock folded in half (hotdog fold), which when dry we cut in half to create 2 Xmas cards.
The method to the madness was the same for both!
We started by doing pastel snowflakes on white paper. I taught the kids a basic 6-sided snowflake, but was amazed at how they took off with their own interpretations and taught each other different designs. Oh, the kids were restricted to only COOL colours of pastels (which was a good refresher lesson in itself.)
They then took blue water-colour pucks, loaded their brush with water and did a wash over their flakes. I like how the colour really varies across the paper with the large projects. Finally we GLITTERED and GLAMMED them up so they would shine under the show lights. Voilà!

Wednesday, November 24, 2010
Mon beau sapin... Oh Christmas Tree!

This week's art project was inspired by my annual clean-up and sort-out of my wrapping station. I found this box lid,
 purchased from a dollar store a few years ago, and thought it would be perfect for the project. Our class has been commissioned to do the back-drop art for the Christmas concert.. "The Littlest Christmas Tree". I think this will work quite nicely! I just need to add a few sparkles here and there! We used sheet music as our back-ground, and drew a Christmas tree outline and some decorations with pastels. We then went over the pastels with watercolours.
Thursday, November 18, 2010
Arctic Expressions

After pondering the marbled paper for a week, and remembering that I should make some cross-curricular links, I decided use the paper as an interpretation of the Aurora Borealis found in Northern Canada. I just liked how the swirling colours mimicked the free form of the "Northern Lights". In Social Studies, we are studying Canadian symbols.. and what better symbol to place in front of the "Aurores Boreales" than an inukshuk! It's even on the Nunavut Flag!
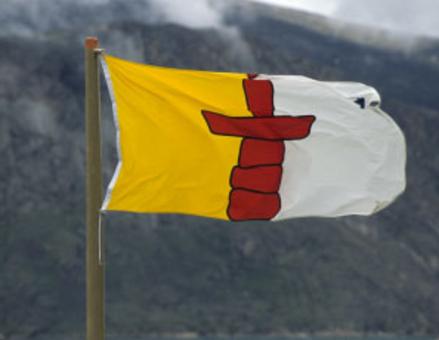
The students are super familiar with the Inuit inukshuk as it was symbol for the Olympic Winter games here last year. I also showed them some google images, such as these:


I had the children make some rock-like paper by splattering black and white on grey with tooth-brushes. While we got great results on paper, we also got results on my wall, hanging chart and cd player! Oops!
The next day, we looked at inukshuk images and thought about the rock shapes, then cut and glued and glittered with "snow"! Here's one of the display boards (it's missing the title which will go in the middle!)

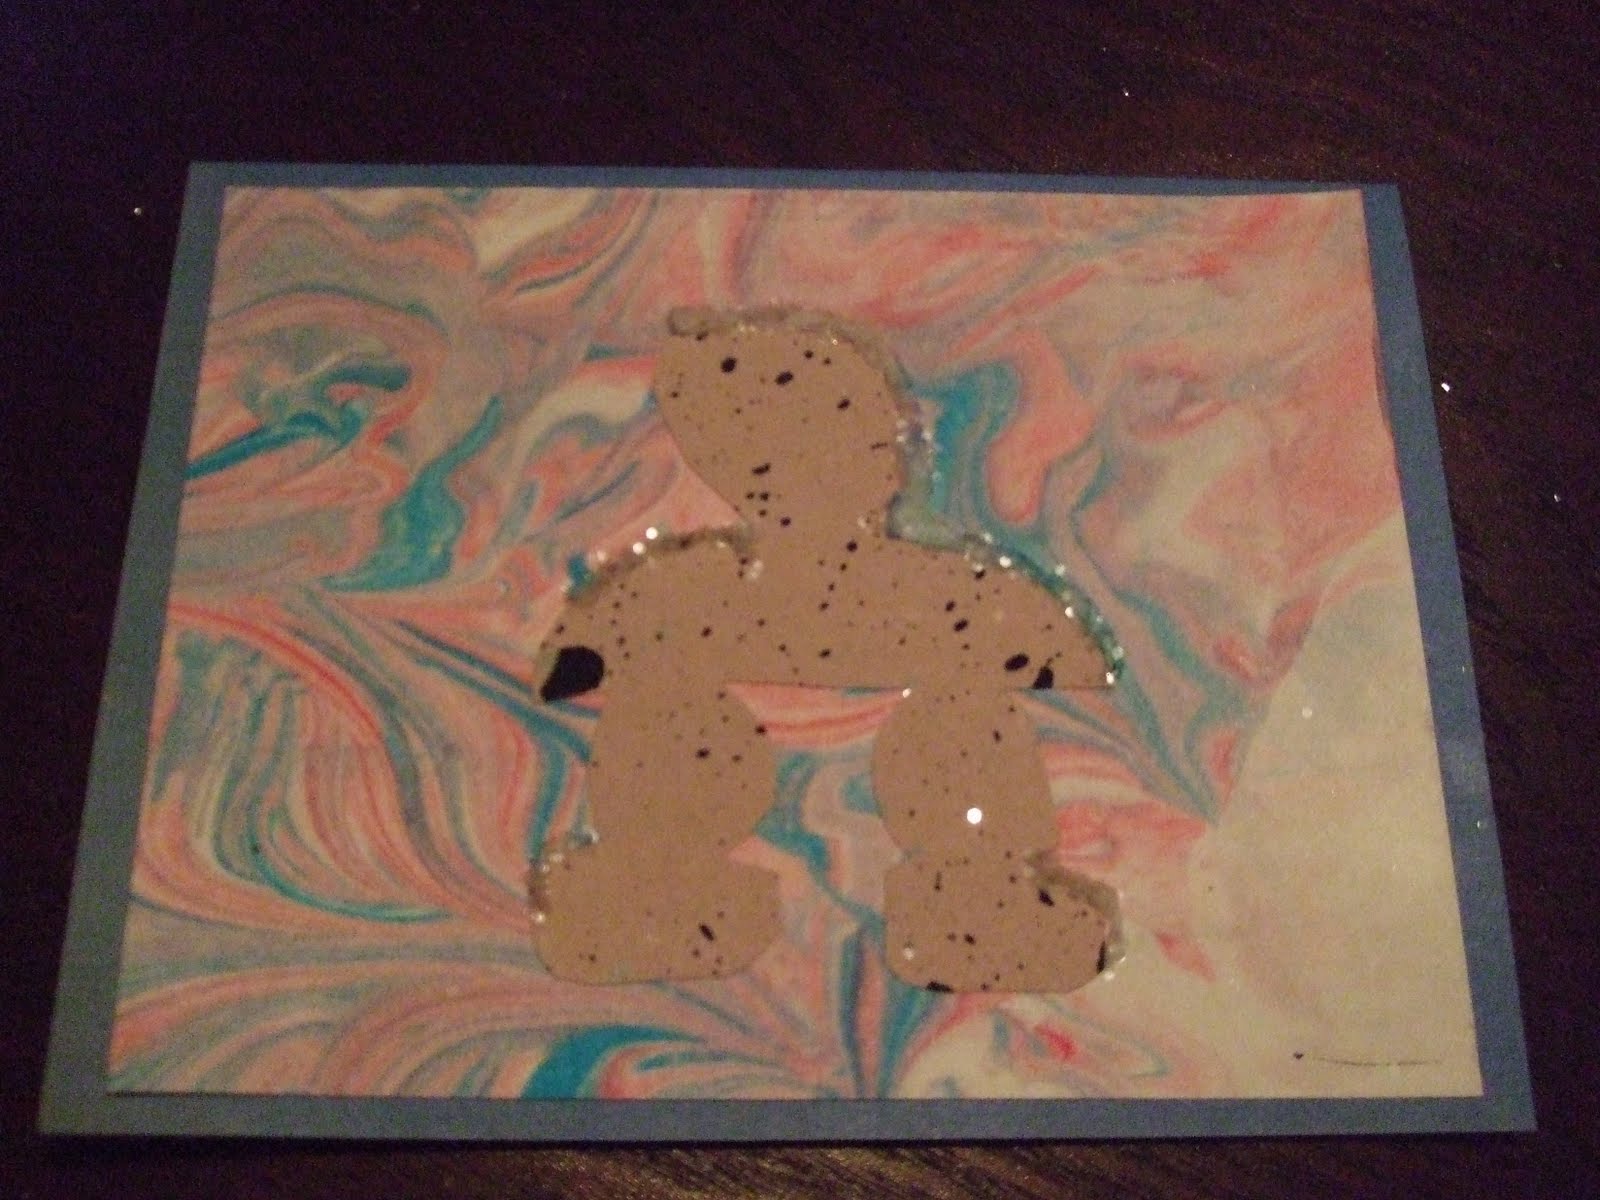
I got so excited about this project that I decided that these would make excellent Christmas cards. So I marble-ized cardstock with the Joyeux Noel printed twice on the bottom. After the paper dried I cut it in four and glued the non-wordy quarter to the front of another piece of plain cardstock, and the message quarter on the inside of the card. Then I used some of the left-over "rock" paper my students made and cut little inukshuks. I finished off the project by glitterizing the top and side of the inukshuk. I LOVE these little guys!

Here's one of my little inukshuk friends up-close! I can barely stand to give them away!
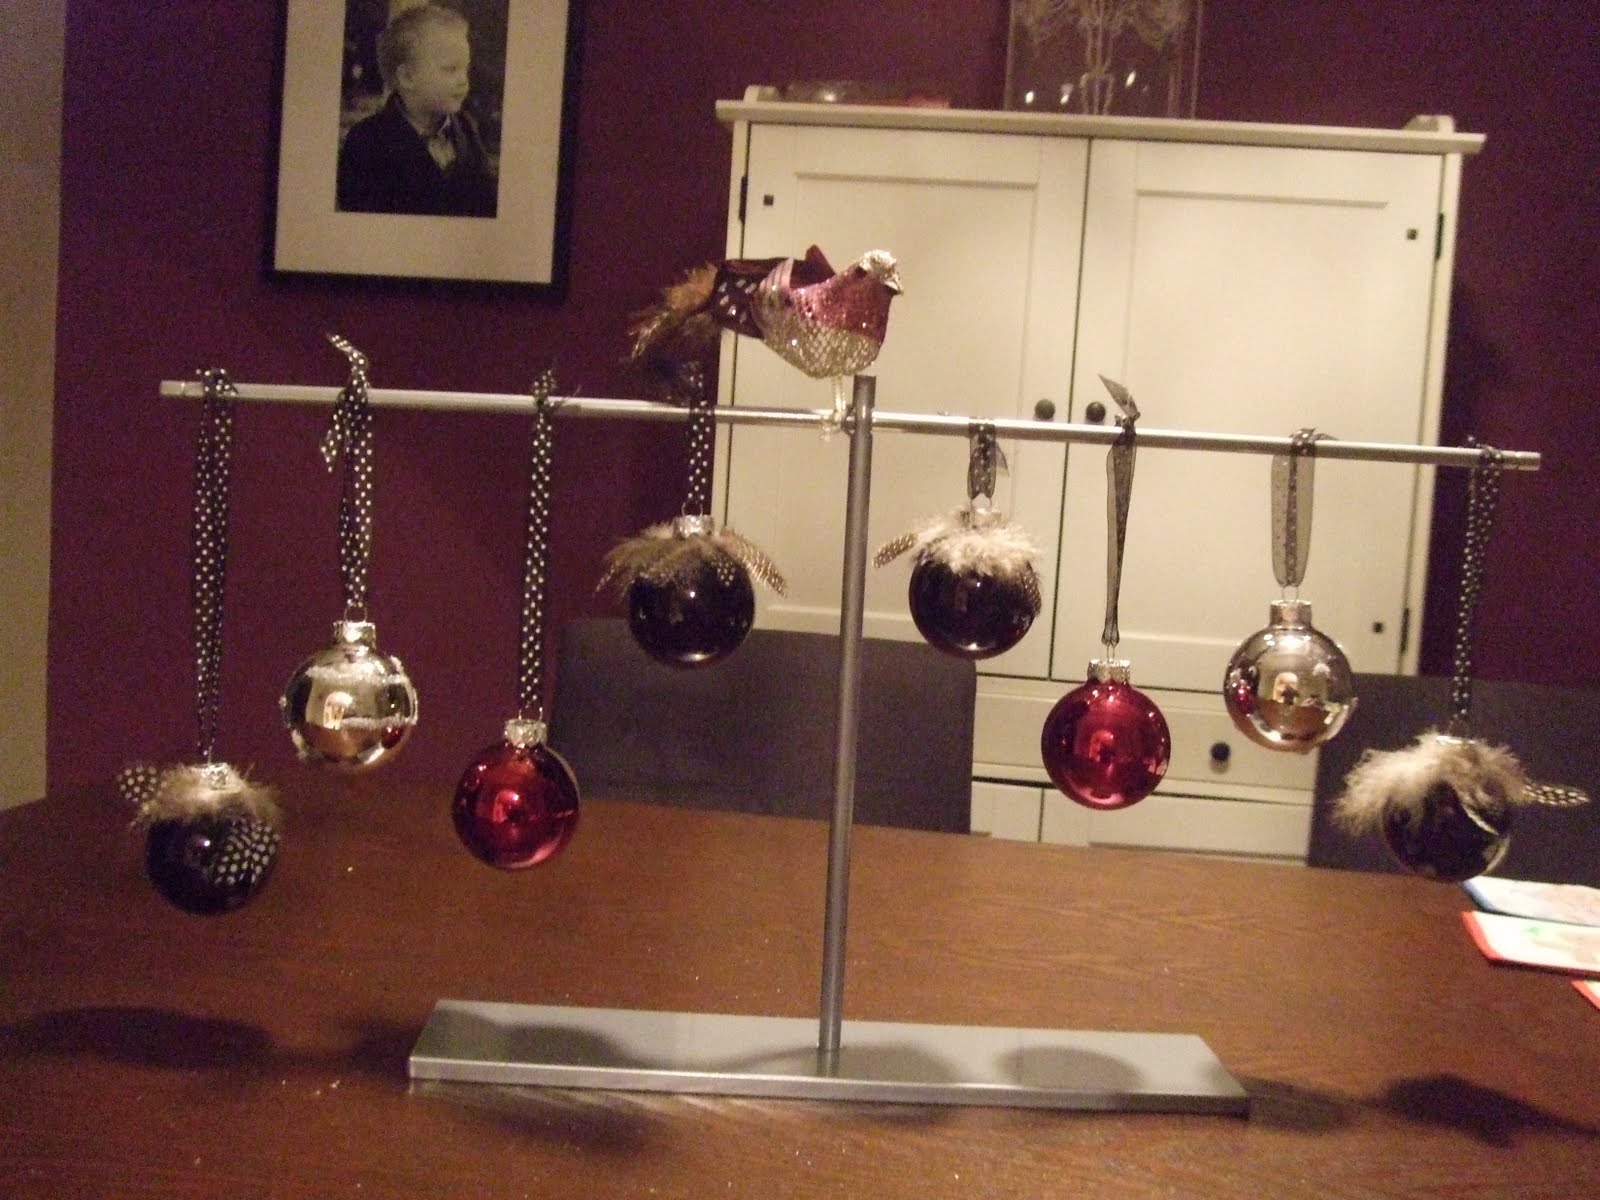
Sorry, this last bit is for my mom, it's of my Christmas center-piece in my dining room. I made the feather balls and glitterized the silver ones. Then hung them on this fabulous T-stand from Ikea (I bought two- the other one holds my ribbon at my wrapping station!) I love it with my fabulous chandelier from Glasgow and Plum Passion paint from Benjamin Moore!

Tuesday, November 16, 2010
Rick-Rack Cards
We had a lovely creative Sunday afternoon chez Reddick. My boys (3 & 4) painted with their crayola water-colours and I started on some Christmas cards.


Here's the product! (NB: These are actually 4 different cards!) I found a steal of a deal on the decorations for the rick-rack trees at the new $ store!


Here's the product! (NB: These are actually 4 different cards!) I found a steal of a deal on the decorations for the rick-rack trees at the new $ store!

Tree Mosaic - Mosaique de Sapins
I love lids! In particular, orange juice lids. I love their colour, texture and the endless possibilities of the circle! I've been collecting them for a wee while now, and decided that it was finally time to use them!
I had the idea of drilling holes in each lid and then creating a larger shape with them. Because Christmas is around the corner, and the shiny colour of the lids I decided to do a simple tree shape. Even though I broke my uncle's drill bit the first round, he kindly finished off the rest of the holes for me.

Because I didn't want to do the work twice, I thought I should lay out the lids before colouring them - just to make sure I had enough. I put tiny straight pins through the holes and pinned them to my bulletin board in a lovely tree shape.

Not only did I have enough lids, I had JUST enough! No, to be honest, the design changed as I got towards the end of the pile of lids. But I'm glad I did this step before they were all coloured. This way, I could show the class where I was going with the idea, and also the importance of orienting the hole to the top of the lid when colouring the design.

I bought two big sets of coloured sharpies before school started at Costco I've been so excited to use them! I encouraged the kids to decorate their trees, so that the greater tree would have some small decorations too. As the kids finished their lids, I simply slid them onto the pins. What an easy bulletin board display!
Here is the finished product.. it's kind of hard to see how cool it looks in real life, partly due to my dying camera, partly due to the awful florescents lighting the hall-way!

The kids have had fun finding their trees, and watching this project "grow!" (mind the pun!)
Monday, November 8, 2010
Marbled Paper a la Fiorentini

Shaving Cream + Food Colouring + Fingerpainting Paper = Venetian Marbled Paper!
Thanks to The Stampin' Den for the great tutorial on how to do this project! I didn't have any liquid watercolours, so I pulled out the trusty food colouring and worked like a trick! I'm not too sure how I will manage this project with my class, however.. it's pretty messy (although contained in the tub) - and really only one person at a time will be able to print. I'm thinking I will demonstrate and then have it as a centre for kids to go to. In the picture below, I love how I was able to add some red to the pre-existing blue and green and reprint on either side of the initial blue/green combo.

I did this this morning with my son (kindie) and he loved it and totally felt like he accomplished some "cool art"!
My plan is to use the paper as a background for a dream-picture. In our French text, Astuce, one character recounts her dream.. I might have them draw Marilou's dream, or one of their own with a black sharpie.

Sunday, November 7, 2010
Un nouveau site-web.. en français! ..and another website in English!
Le plupart des sites-web que je suive sont en anglais, mais voici un que j'aime beaucoup:
Tête à Modeler comprend des coloriages, activités manuelles et bricolage pour enfants.
Voici des idées pour Noel! Et j'aime ces idées pour la peinture à la manière des grands peintres.
Voici un autre site-web que tu peux utiliser en n'importe quelle langue!
Thanks to Mini-Matisse (via Quest Artists) for the link to The Letter Playground

My elder son and I spent over an hour exploring the different letters and writing out words. I'm planning on using this one for the inside of Christmas cards and as a colouring sheet for school.

Here's the English version!

Thursday, November 4, 2010
Jour de Souvenir - Remembrance Day

I have been wanting to do this "War Toys into Peace Art" idea for a couple of years now, ever since I heard about it at a BCTF conference. The BCTF (our provincial union) has a great lesson plan pdf which totally helped me out, especially with the letter home to parents.
I started collecting the toys before Hallowe'en, which was maybe not the best time, and am sharing the project with a colleague. We did not end up getting as many toys as we thought, so we had to rethink our project and how we were going to present it at the Remembrance Day assembly. I found this amazing image:

and remembered that I had a bunch of old Legion magazines from my Nana. Aha!!!

The kids and I cut out a bunch of soldier pictures and then painted poppies over the instrument of war.

Because we were doing this with two classes, we needed a few different options, therefore the dove and poppy options. I loved how the poppy turned out, with the collage of poppies over guns. My colleague very kindly spray painted a zillion toy soldiers for me to hot-glue as a border.

For the doves, we have two collages, again, bordered in war-toys.
The first has a collage of Legion members - representing "remembering and honouring".

The second has a collage of pictures the other class found which represented "peace" to them. I love the person with the heart and a poppy-brain!

Note to parents, these fabulous projects will be incorporated in the assembly tomorrow morning, and then will be displayed for the rest of the month in the display case near the office.

Now I really need a project for the Legion poster contest. I'm thinking of maybe this one from "That Artist Woman" - but I'd like to come up with something myself.. My colleague is encouraging her kids to make 2D representations of the same theme: some kind of transformation of the instrument of war.. the idea of a gun shooting poppies really appeals to my hippie background! We'll see what we come up with by next week!
[Edit: I decided to go the easy route and do "That Artist Woman's" fabulous water-colour idea. The words at the top are part of the Canadian National Anthem in French.. which talks about protecting the hearths and rights of Canadians.]

Saturday, October 30, 2010
Skeleton cupcakes
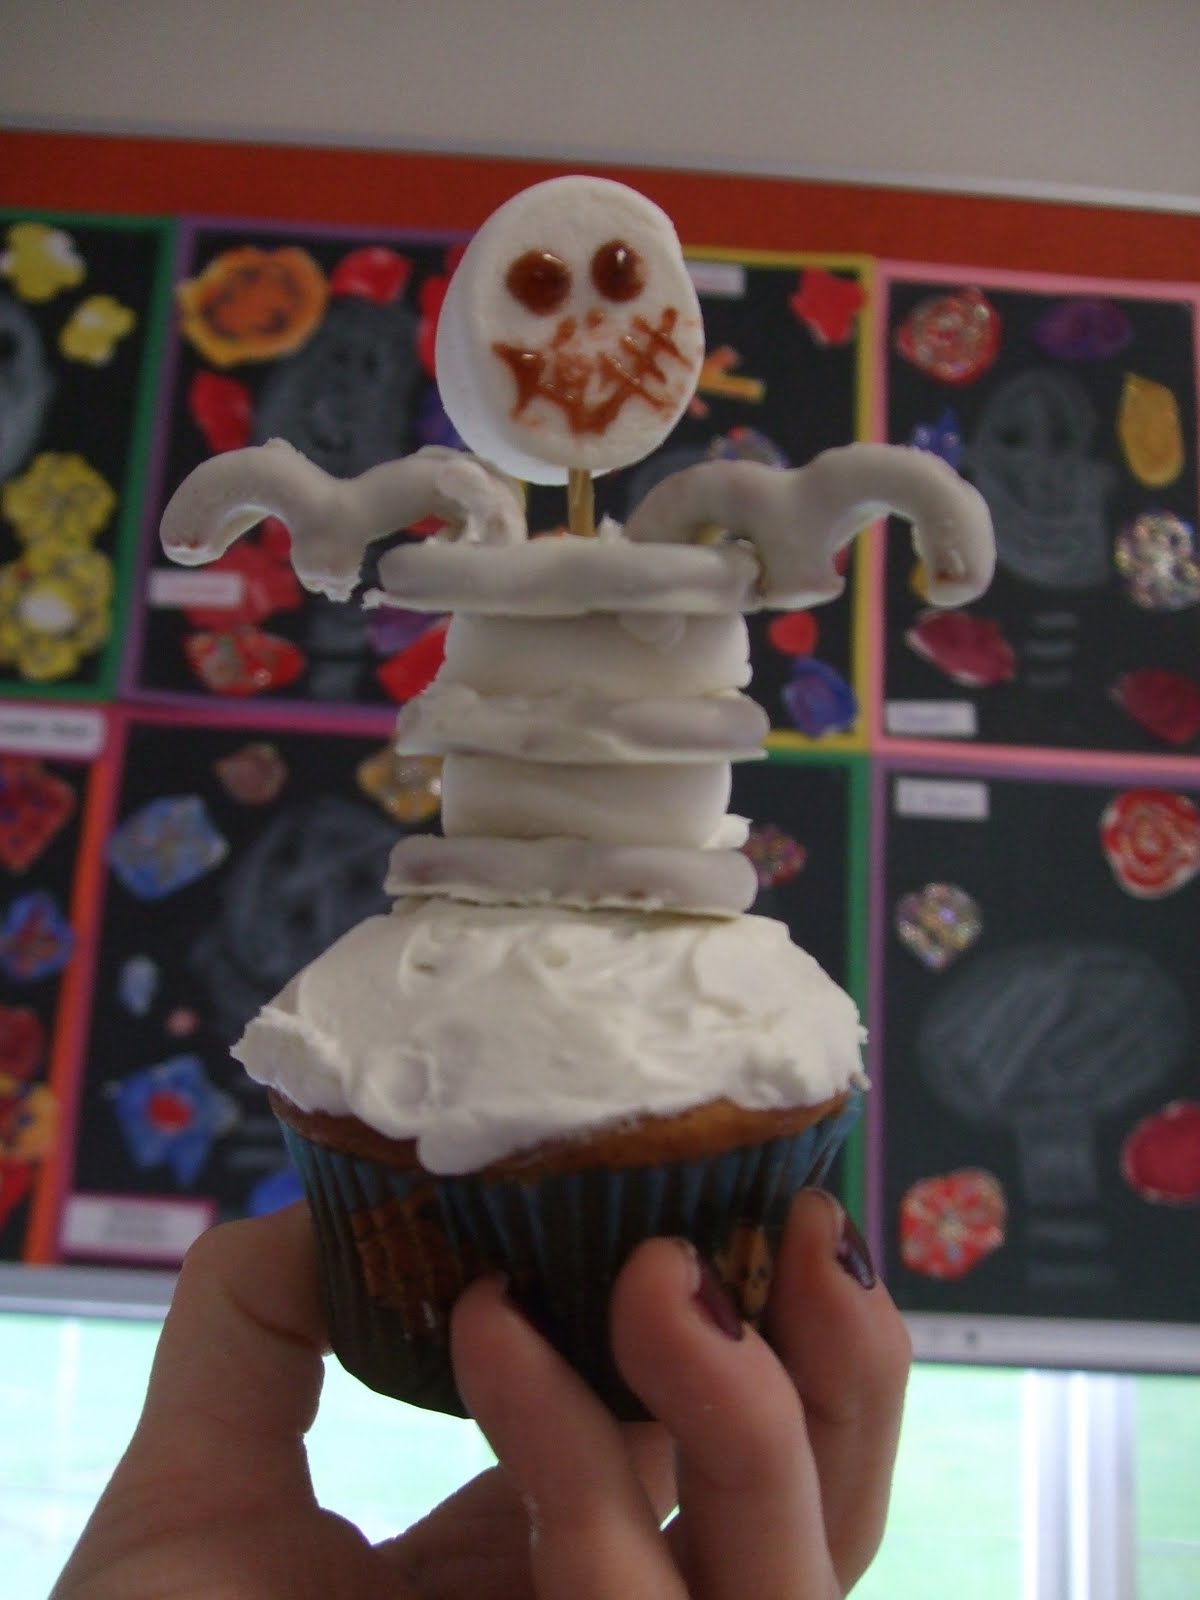
I just had to post these here.. they were too cute not to be archived!
A child in another class brought these to school. His mom had iced cupcakes white, and stuck a long-ish skewer down the middle. On the skewer, she thread alternating slices of marshmallow and yogurt-covered pretzels. The final marshmallow was whole and she drew a face with chocolate gel icing.
(By the way, the face won't hold up too well after going on recess duty with it outside in the drizzle!)
Friday, October 29, 2010
Divali Elephants

Friday (November 5th) is Diwali and is our exciting field trip to the Gurdwara (Sikh Temple)!! Along with a slide-show prepping the kids for our trip, of course I wanted to do some kind of art project to highlight Indian culture. Low and behold, "Painted Paper" posted a fabulous idea! Merci!! I googled "elephant templates" and found some easy images. In the school "dungeon" there is a bunch of coloured burlap that will go perfectly for the blankets!
Here are some of the materials I needed:

I ended up having to do this in several stages...
1-"blop" white and black tempra paints onto template-printed paper and scrape using my favourite plastic scrapers, to create a fabulous textured GREY! Let dry.
2-cut out elephants, glue on burlap (this was precut) and bedazzle them with sequins, using white glue. Leave to dry.
3-glue (glue stick) coloured construction paper to the MIDDLE of pre-cut black construction paper. Design a border using pastels and geometric shapes.
4-glue (GLUE STICK) elephant onto coloured construction paper. - May need to leave under heavy books to dry flat.
TA-DA!

Bat Cards

I had my first class with the English grade 2s today. I had NO idea how it was going to go, so I thought we'd start simple and see how long it would take!
The idea was taken from "That Artist Woman" who found the original post on the Better Homes and Garden's site (also where you can get the template). Needless to say I have started to subscribe to that site which currently has a 100 days of Holidays thing, and I get ideas emailed to me every day!
While normally I would do some texture on the body or wings, I kept it simple and just added a few painted lines to the wings. I liked the buttons for eyes, and then I used my cool new stamps from Dollarama to do my message.
Joyeuse Halloween!

Subscribe to:
Posts (Atom)