Tuesday, December 14, 2010
Links!
Here's a whole post devoted to Art Teachers online! It's great to be able to browse, especially when you're home with a sick child.
Thursday, December 9, 2010
Easy Elf Ornaments - Les Lutins pour le Sapin!

I LOVE this craft, this is the second year I've done it. We get these cool little portrait-stickers when the kids get their school pictures done - some teachers give them to their kids, but I always hang onto them, as they make for great mother's day, father's day and Christmas gifts. I made this template of an elf, based on the size of the sticker. On an 8.5x11 piece of paper, I can fit 4 elves, enough for 2 elf ornaments.
(If you want me to try and scan and email this template, you can email me :)

Then I cut them up, and stick on the sticker and hand them out. I normally print them onto cardstock, but I did it onto normal paper by accident and it was fine.

Get the kids to colour it and glitter it up.
Then I roll it around a toilet-paper tube and staple the bottom and top.
I love my class of little elves!

Tuesday, December 7, 2010
Snowman Families - Les familles de neige


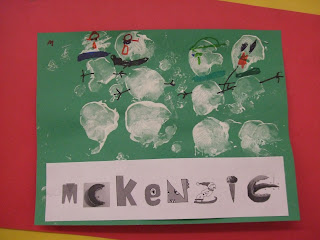
I love the idea of doing a family of snowmen that Gail did. While she used a series of different pre-cut foam circles to print her snowpeople, I didn't have any pre-cut circles that would work to stamp. Then I remembered a few posts on my blogroll from a few months ago about teachers who were having their students make their own stamps out of plastecine! Now THAT I had!

I showed the kids how to roll a ball with the plastecine and then press it down to create a circle on the bottom. By making their balls bigger and smaller, they could create a variety of sizes of circles for their families. Then I showed them how to make a snowflake stamp by making indentations with the side of their pencils or poking the pencil in the circle. All of these "stamps" were then dipped in white poster paint and printed on green or red construction paper.

Finally, this afternoon, we paired up with some big buddies to play on letterplaygound! Each kid made their last name to go with their snowman family.

Labels:
bonhomme de neige,
Christmas,
hiver,
noel,
print making,
snowman
Snow Flakes - Les Flocons de Neige

This was a project done on both large and small scales. I taped 2 12x18 sheets together to create the large for our Xmas concert backdrop (mounted on black) and then I also did the same project on a piece of 8.5x11 cardstock folded in half (hotdog fold), which when dry we cut in half to create 2 Xmas cards.
The method to the madness was the same for both!
We started by doing pastel snowflakes on white paper. I taught the kids a basic 6-sided snowflake, but was amazed at how they took off with their own interpretations and taught each other different designs. Oh, the kids were restricted to only COOL colours of pastels (which was a good refresher lesson in itself.)
They then took blue water-colour pucks, loaded their brush with water and did a wash over their flakes. I like how the colour really varies across the paper with the large projects. Finally we GLITTERED and GLAMMED them up so they would shine under the show lights. Voilà!

Labels:
Christmas,
flocon de neige,
hiver,
noel,
snow flakes
Subscribe to:
Posts (Atom)